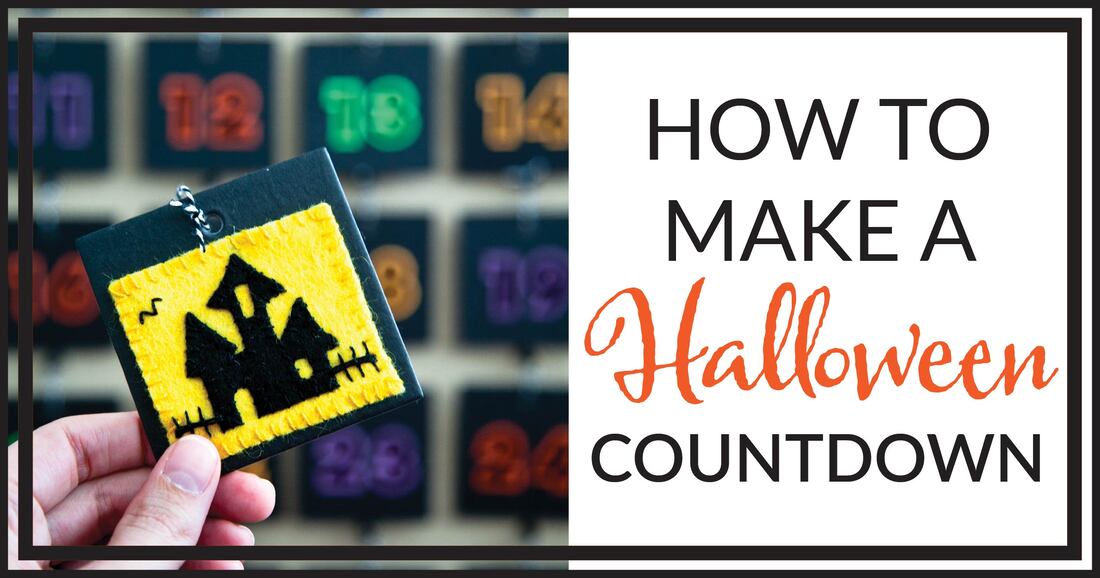
 If you have a little one at home, anxiously anticipating Halloween, why not make every day of October exciting? This countdown was really simple to make, and only requires beginner-level sewing, so read on for a step-by-step tutorial! 1. pick your countdown squaresI wanted perfect squares with holes in the top for easy stringing and hanging. You could make your own, but I wanted to speed up and simplify the process. I found these "tags" at Michael's, which are essentially a thick, rigid cardboard. They were perfect!  2. test your dimensionsCut a background square out of felt that fits below the hole at the top (like the piece of green felt in the photo below). When you know it's the right size, use it as a template to cut all other background squares. 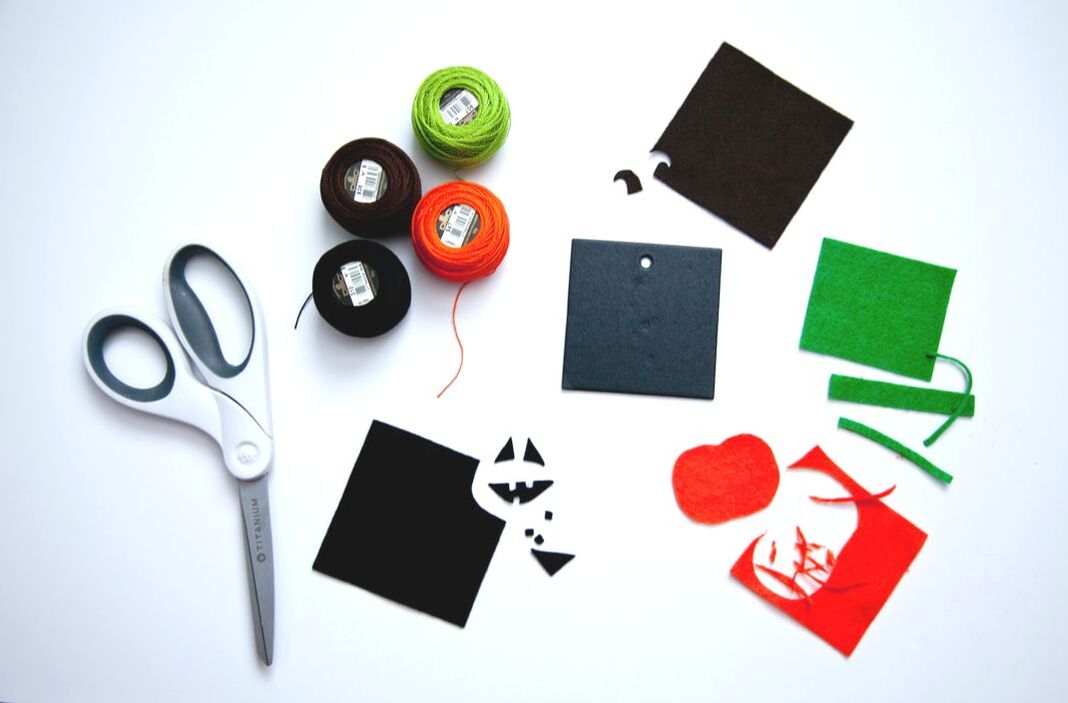 3. do a run-through with your pictureBefore you sew, lay your cut pieces on the square to make sure the picture is going to fit nicely inside the background square. 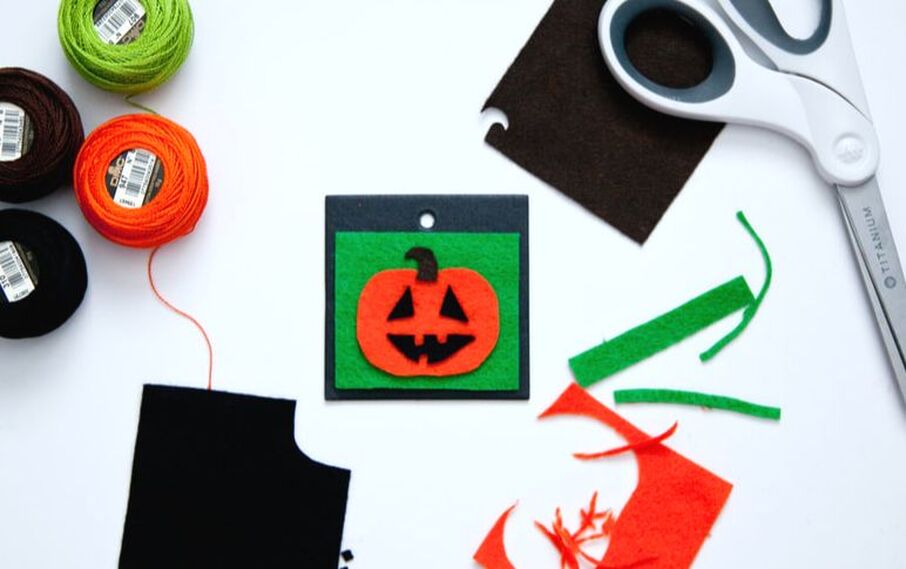 4. start sewingNow that you have everything sized properly, sew the picture onto the background square and whip stitch or blanket stitch around the edges. Glue the finished sewn piece onto your square with hot glue or other permanent adhesive. 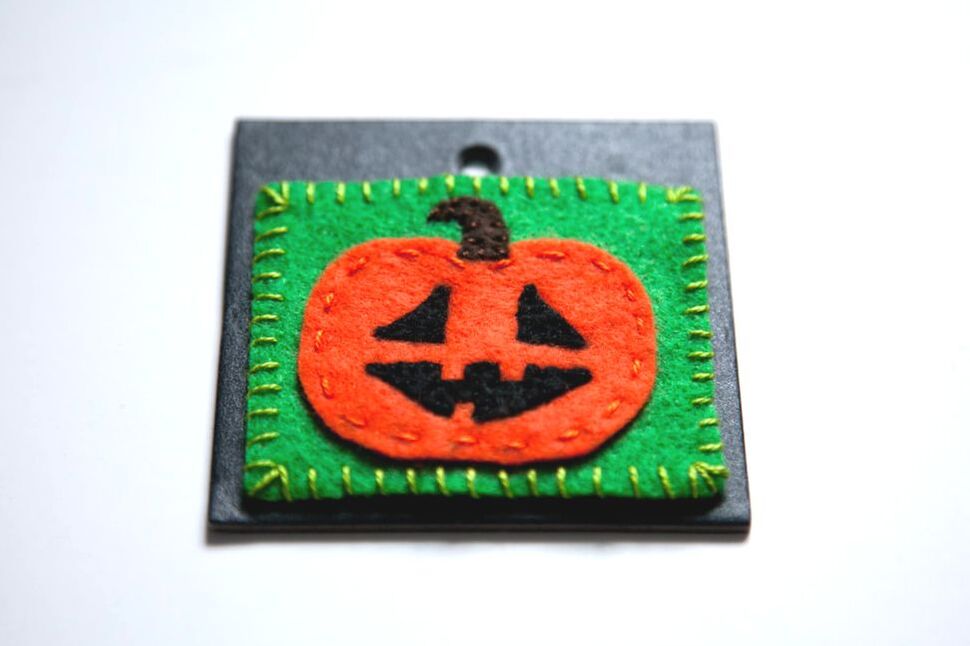 5. add the hangerLoop a cute piece of thread or yarn through the hole and tie and knot at the top. It will hang on a thumbtack on the bulletin board when you're finished. 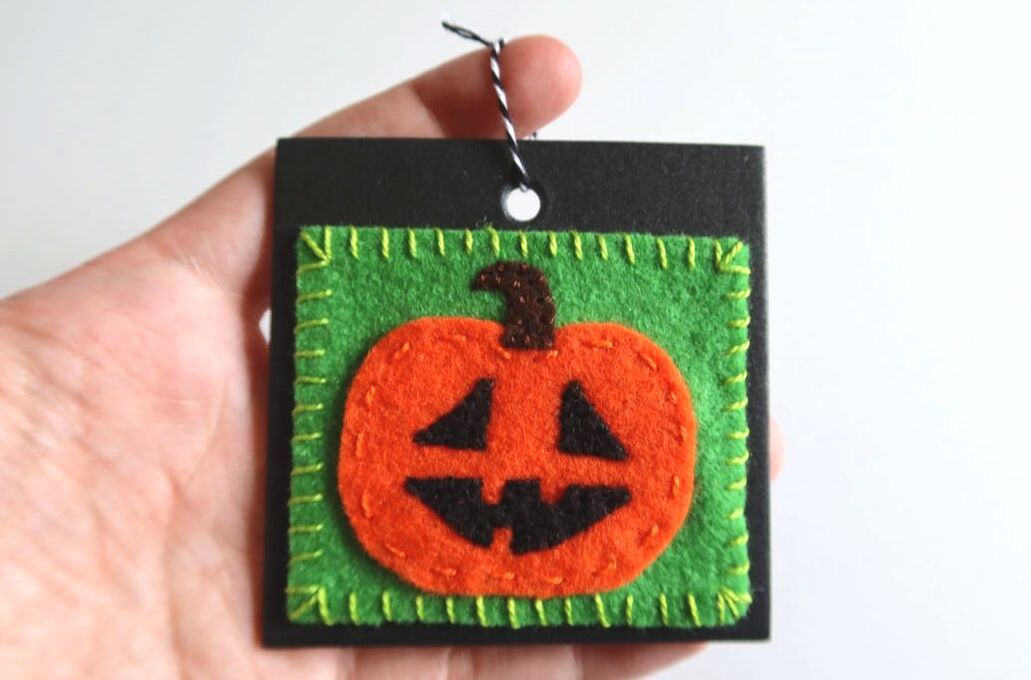 6. do it again (29 more times, to be exact)Now that you have your method down, the following squares will go quicker (remember to set aside a piece of background felt that matches the size and shape of your first one, for each additional picture. Use it as your guide.) Here are some close-ups and tips on each picture I made, but feel free to let your imagination run wild and come up with some of your own, or swap out colors. 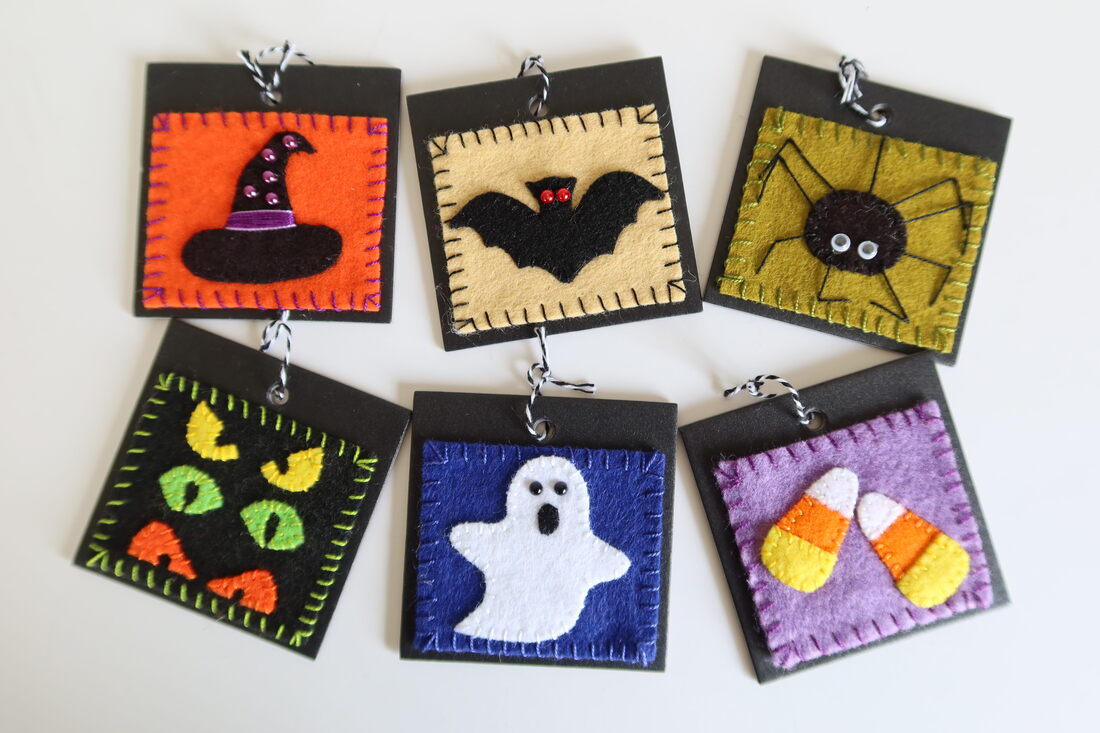 These classics are pretty basic. The shapes are easy to cut out and don't take much time to sew. Beads are hot glued on for the ghost's and bat's eyes, as well as the polka dots on the witch's hat. Googly eyes are hot glued onto the spider. For the spider's legs, make one straight stitch from inside the edge of the body and down through the background square, then bring another stitch from the bottom and down through the corner of the first half of the leg. Just make sharp angles and it doesn't really matter how consistent they are. 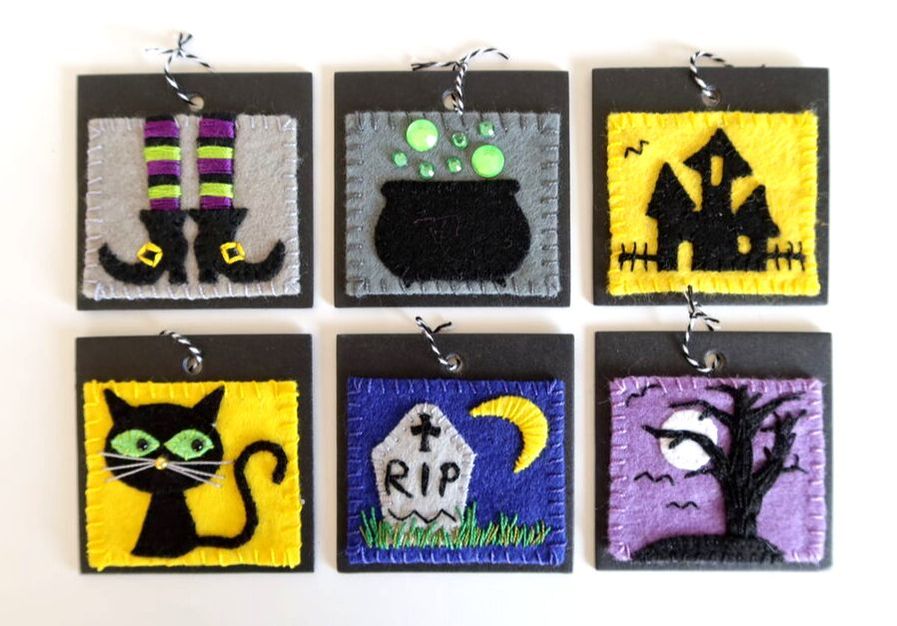 These spooky scenes are slightly more involved, but some of my favorites. For the witches stockings, I did one straight stitch, from one side of the leg to the other, over and over, very close together. Switch colors every 5 or 6 stitches. The cauldron is a basic shape, with green jewels hot glued on for the bubbles. The house is one shape, with cutouts for the windows. The cat's tail is a piece of yarn, laid on the square and then stitched over from one side to the other along the whole length. Eyes and nose are hot-glued beads. The grass by the tombstones is 3 different shades of green to give it dimension, just using simple straight stitches. The tree is all individual straight stitches. Just keep adding until you like the shape. 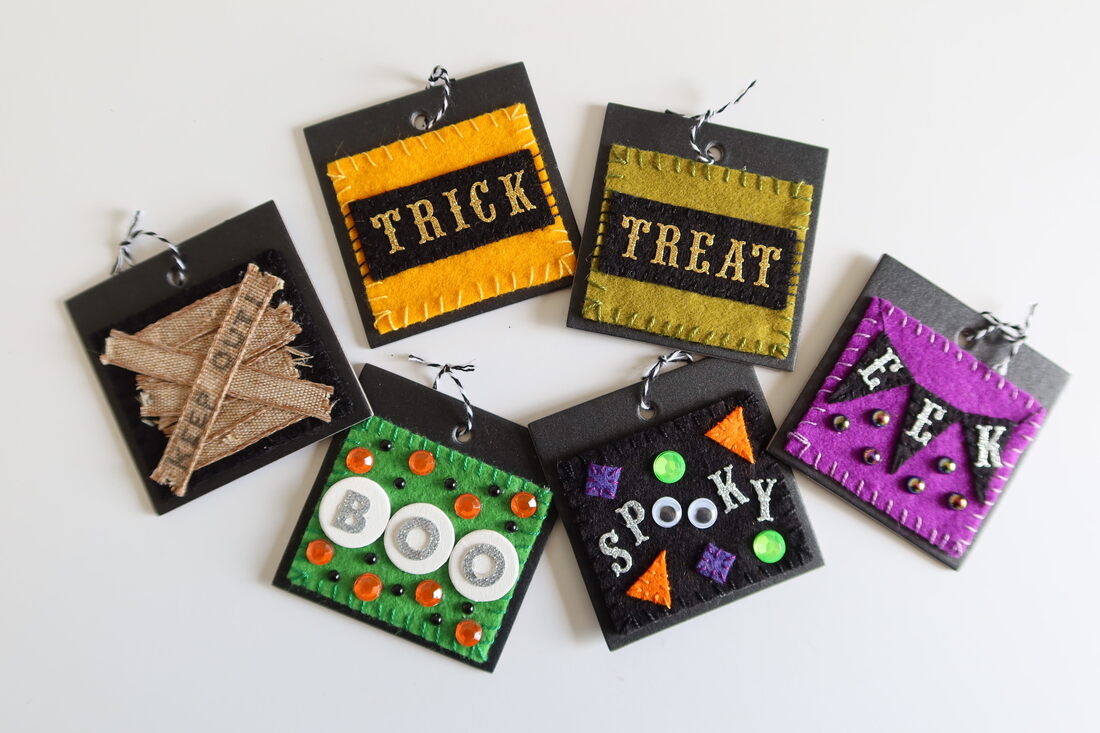 I consider these squares "cheats", because they were so easy. I bought some sticky letters to glue on, and added some beads and jewels. The boarded-up "Keep Out" sign is made of ribbon, cut into pieces and purposely beat up by shredding the edges with scissors. I wrote "keep out" with a sharpie. Throw in some of these easy ones to help knock out a few numbers and keep moving along quickly! 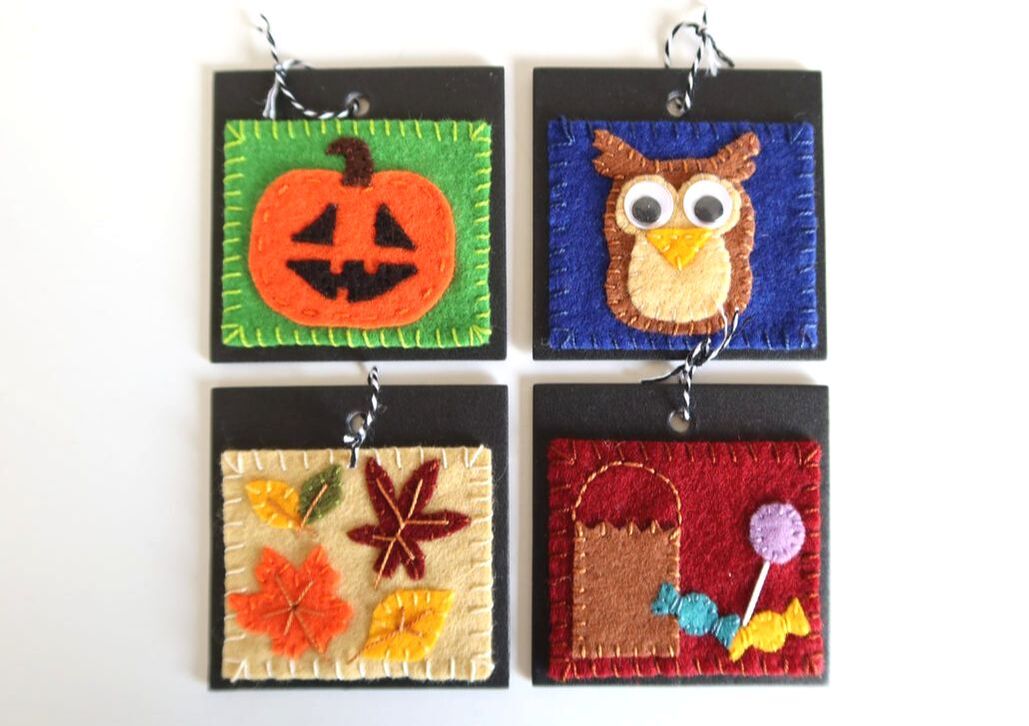 These fall staples are super basic. Even the owl is just a few easy shapes and some googly eyes glued on top. The leaves get more dimension when you use straight stitches in the middle to create the look of veins. 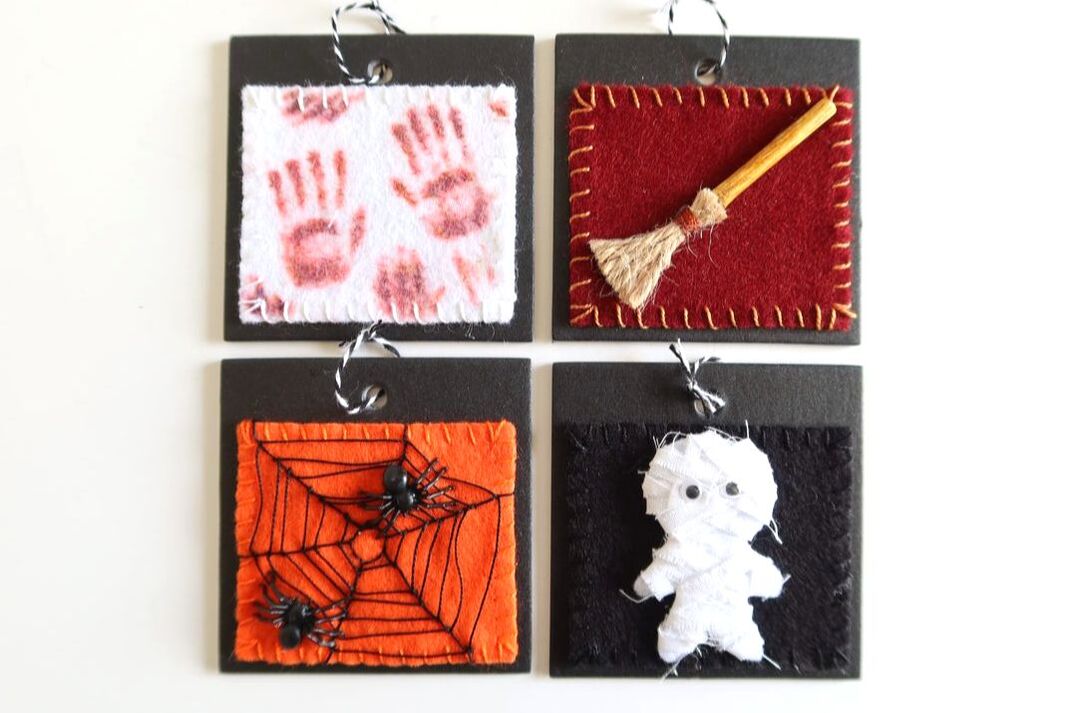 These are some of the more unique creations. The bloody hands are just colored on with fabric marker. I used red and a little brown to make it darker. The broom is a craft stick with some twine and red thread tied around it, all glued together and glued to the square. The spider web is just straight stitches, with plastic spiders glued on. The mummy is a white piece of felt for the body shape, then a thin strip of cotton (shredded at the edges with scissors) wrapped around the body for several layers and glued in place, followed by glued googly eyes. 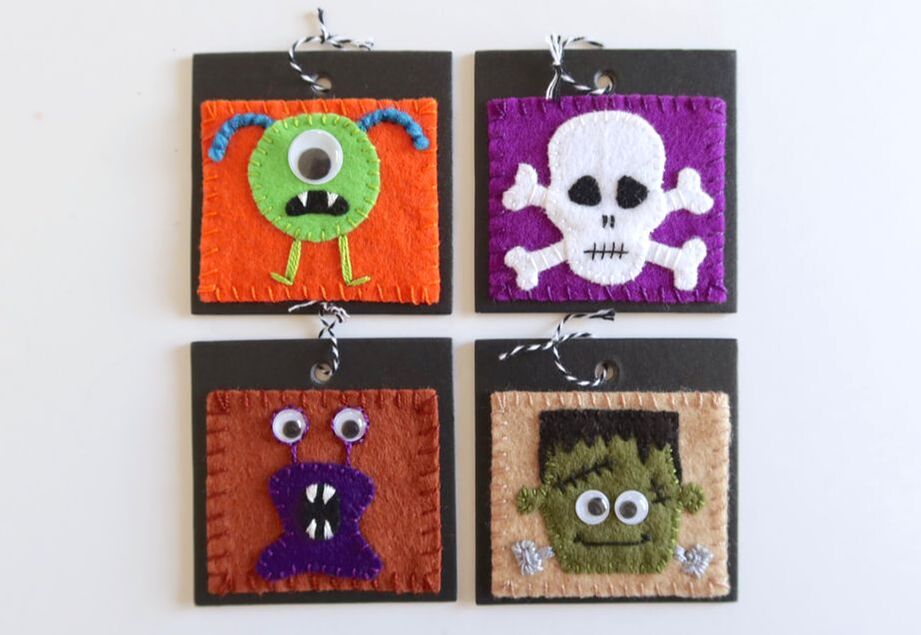 These characters bring the project to life with their silly faces! Have fun with some monsters by cutting unusual shapes - you can't go wrong! The teeth were done using straight stitches at angles, and the skeleton and the Frankenstein stitches are perpendicular. For the green alien, I used yarn to get the arc of the antennae, then stitched over them. 7. cut out the countdownThe front side of each square should show numbers 1-30 for the countdown. I put black stickers on different colored card stock and then cut around them.  8. attach the numbersHot glue the numbers to each square, then arrange on a bulletin board using thumbtacks in rows.  9. make the "happy Halloween" sign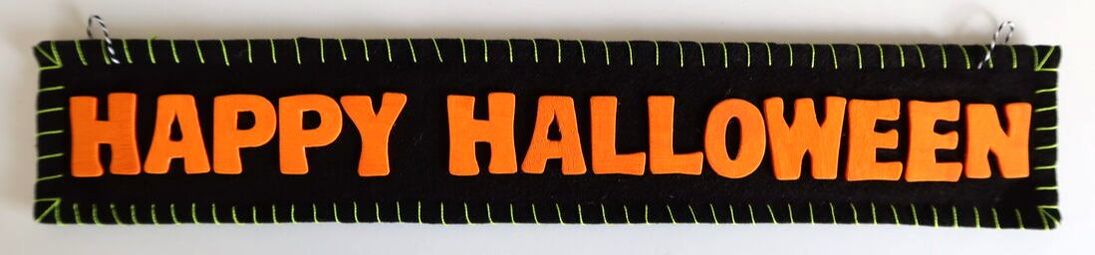 The "Happy Halloween" sign is made of two black strips of felt sewn together, with poster board between them to make it rigid. The words are made from wooden letters from a craft store. Paint them orange, and once dry, hot glue to the felt. Lastly, sew a loop of thread to match all the squares in the project at the top, one on each end. 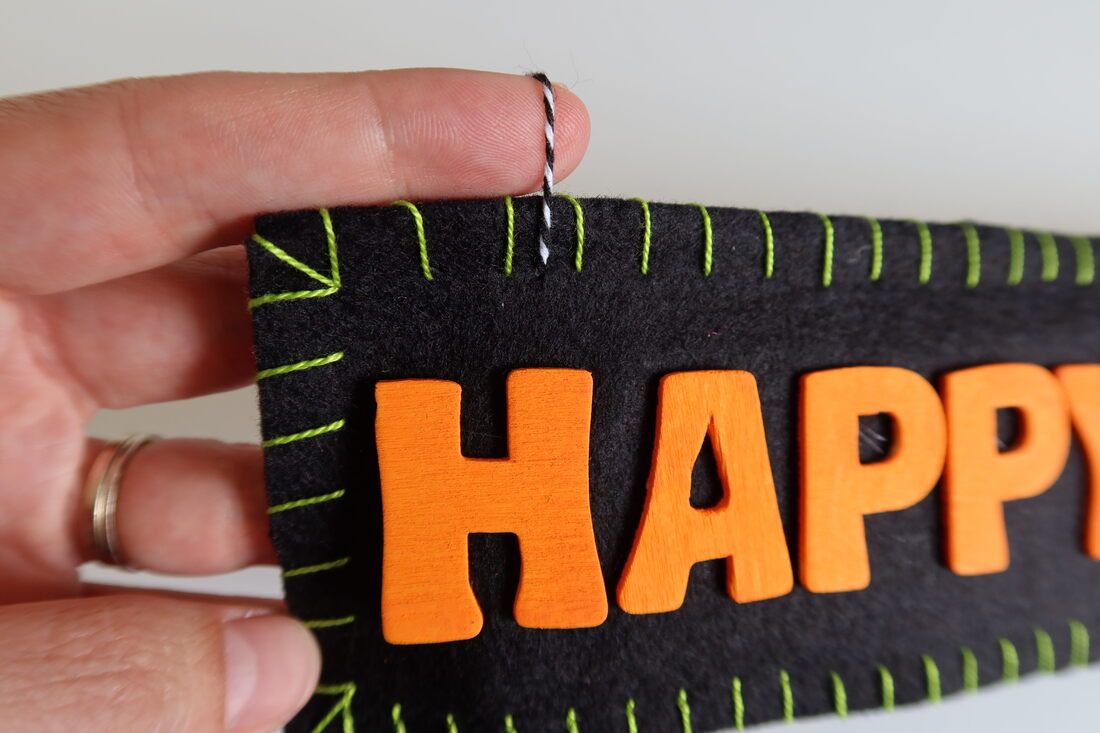 10. assemble the boardMeasure out push pins so that you have neat rows to hang each your squares. Hang them up and admire your hard work! 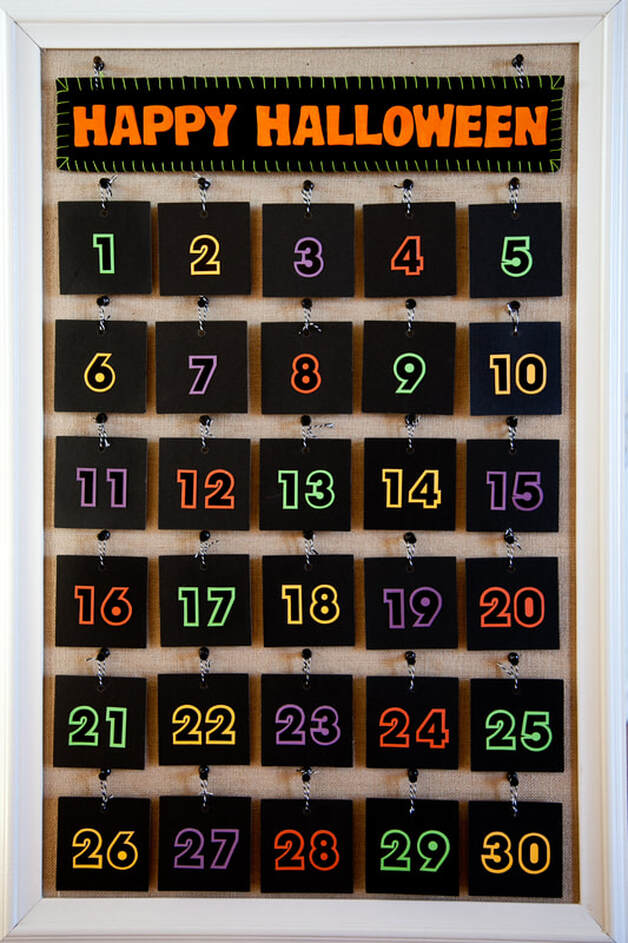 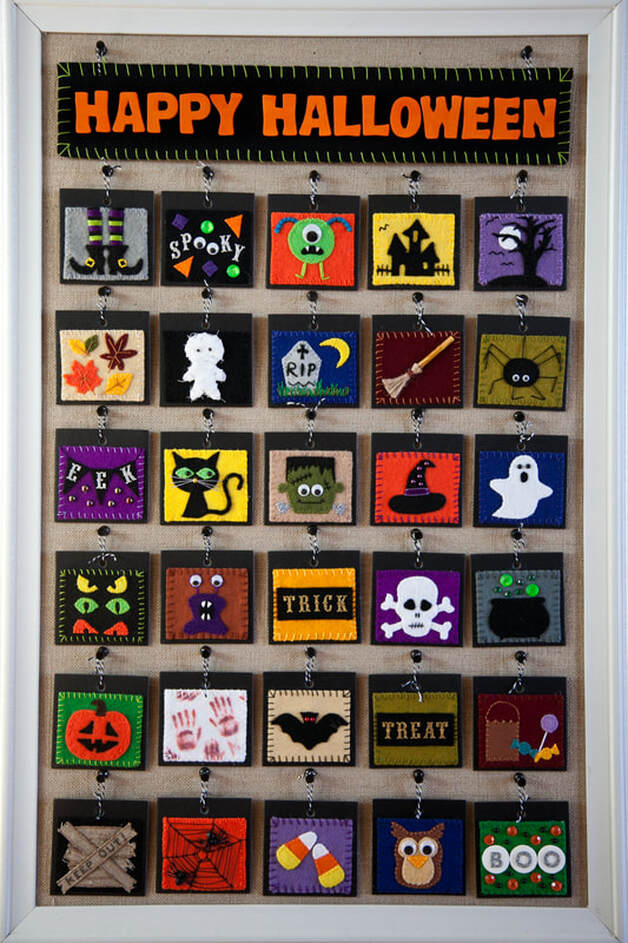 Each night, watch as your little one excitedly flips a square from number to picture, now one day closer to Halloween! 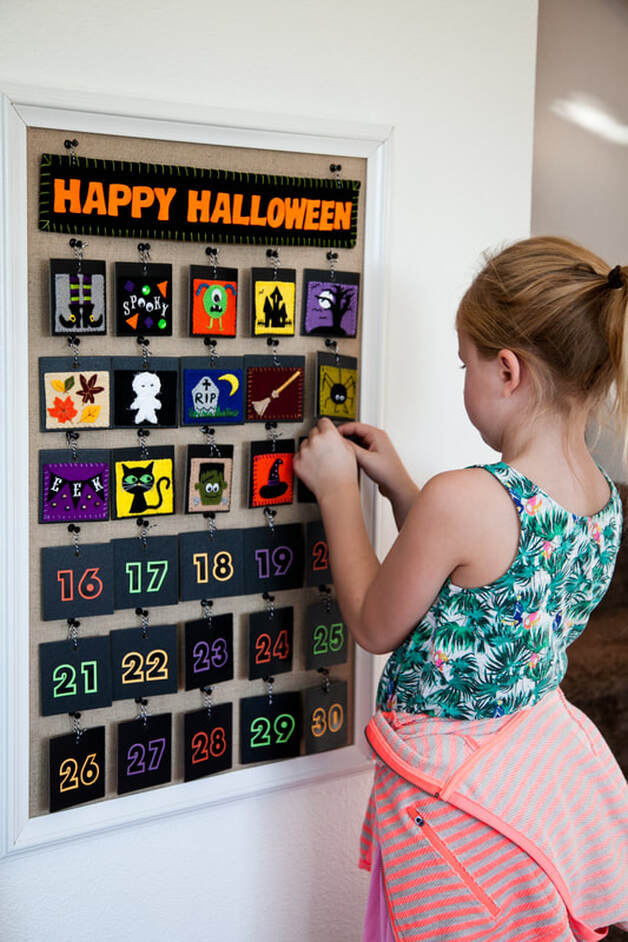 This Halloween countdown is so much fun to make, and you'll be creating a tradition your family can enjoy year after year! Happy crafting, friends!
6 Comments
Scott
9/8/2019 09:38:46 pm
Beautiful, and so creative!
Vicki Shaw
9/9/2019 09:39:44 pm
I love everything about this Countdown!...the vibrant colors, the cute designs, the background, AND the easy-to-follow steps!!
Bobbi
9/17/2020 10:02:33 am
This is amazing. Can I just have you make one and buy it?! My sewing skills are not the greatest
LUren
10/3/2020 04:58:32 am
Would you be willing to make/sell one of these for me?
Lori kapp
12/2/2020 12:53:43 am
I love everything about this calendar! Do you hv the patterns available?
Michelle
10/8/2023 02:53:34 pm
Thank you so much! I knew I wanted to make a countdown calendar so I came to Pinterest for ideas…. I love yours and you have given so many wonderful and perfectly descriptive ways to make it! No others compare in what I had in mind. I love how the dates pop and the kids get to turn 1 every day and reveal more cute Halloween decorations Your comment will be posted after it is approved.
Leave a Reply. |
CategoriesAbout the author...
Hi, I'm Mandi! Artist, photographer, and compulsive organizer...
Archives
August 2019
Categories |